This is fair warning! Do this at your own peril. Compressing springs is dangerous! This worked for me, but I probably just got very lucky, and didn't get a spring shooting into my eye. Maybe someone out there has a better idea to share.
Reeves Drive Woes
The Reeves drive on the lathe allows you to turn a lever/knob to adjust the lathe speed. There are two pulleys, one on the motor shaft, and one on the spindle shaft, that each have a fixed side, and a inter-meshing movable side, so that together they form a variable diameter pulley. The spindle shaft pulley's inner side moves with the lever action, and a spring on the other motor shaft pulley allows the outer side of it's pulley to move, keeping tension on the belt.
I noticed that I couldn't make the speed any higher than about half way before the spindle would loose power and wouldn't go any faster. After reading posts online, I decided to try to take it apart to see what was going on. The motor shaft pulley's movable side wasn't sliding freely past a certain point, so the the diameter of that pulley stayed too small to allow the speed to increase more. The belt would just get very loose on the pulleys, until the spindle wasn't even turning any more.
The movable pulley on the motor shaft is held on by spring trapped on the shaft end by a 5/8th" retention/snap ring. To remove the movable section of the pulley, I removed the belt, and moved the pulley as far to the right as I could to relieve the spring pressure as much as possible. Then I pinched the spring with pliers while I removed the snap ring. So far so good. I took the spring and pulley off and cleaned the shaft, and scrubbed it with steel wool. I took a piece of fine grit sandpaper and rolled it up and stuck it in the pulley hole and lightly sanded the inside a little. This was enough to get the pulley sliding freely again on the shaft. I didn't use and oil or grease since that would just seem to make the shaft gum up easier with fine dust particles. Now the fun part: putting it back together. How does one safely compress the spring enough to get the snap ring back on? I tried various methods, but the spring was too strong and these all failed. I finally came up with the contraption in the pictures below. I used a clamp and a piece of maple to extend the clamp over the end of the shaft and hold the spring end securely. It work very well, I was very careful and cautious so that nothing felt like it was going to SPROING out of control on me.
This is just a 12 inch Jorgensen bar clamp with a piece of Maple slid over the bar. I had to file off the bar stop-tabs to allow the handle end of the clamp to slide off temporarily, while I put the wooden piece in place.
I drilled out the section in front of the spring retention area a little to allow more space to get the snap ring on, while still providing support from surrounding wood.
The trick was leaving enough wood in front of the spring, so that it wouldn't break under the pressure, while still leaving enough room in front of everything to get the snap ring on. The extra thickness around the spring on the back side helped bolster the retaining section, so it wouldn't break as easily. Using thinner wood over-all failed as it would just snap off under full spring tension.
At least now I have a way to service the darn thing if I need to do it again in the future.
I bought an old Stanley 45 combination plane on eBay, and wanted to be able to store it assembled, instead of having to put it together every time I wanted to use it. The plane has a main body into which two rails/rods are inserted. The rods then support the secondary body and a third piece, the fence. Both the secondary "skate" and the fence parts slide along the rods. There are two pairs of rods included with this plane, a short (4") and a long (8") pair. The plane came with a full set of cutters and a splitter. From what I have watched and read, most people just use the 1/4-inch grooving blade in it for making dados and grooves.
I made the box from a piece of pine board I got a big box store. I made a box-joint jig a year or so ago, and I am always amazed how nicely the joints fit together. The boards had a slight cup in them, so I clamped them together in pairs to flatten them out before I ran them through the stacked dado blades on my table saw with my jig/sled. That seemed to work well. I used a small piece of 1/4" plywood for the bottom. I planed the lid piece down like a raised panel so it would fit snugly into the grooved along the top. I used the Stanley 45 to make the grooved for the top and bottom. Anyway here is the box:
We had a couple oak trees (shared the same trunk) die a couple years ago, and I had a guy come and fell them last Monday. Now I have a big pile of logs and branches to deal with. Both trees were very straight and tall, and I was left with a couple long logs that came from the sections right above the trunk. One is about 12 feet or so long, and about two feet in diameter. I watched some YouTube videos and proceeded to split it. Here are some pictures from the felling and the splitting.
Korte Tree Service came and cut down the two trees. He did a great job, and was the least expensive I could find in our area. He used a bucket truck to get way up in the tree to bring it down safely and quickly.
He could position the bucket pretty much were ever he needed.
Splitting Logs
I made some gluts from some of the branches to help split the logs.
I scored the end of the biggest log with a hatchet and started the split with the hatchet used like a small wedge. Then I was able to start driving some regular steel wedges. It started splitting pretty well. Once it split wide enough on the end, I started adding the gluts to hold the split open. I used a 4-pound hammer for most of the pounding. It seemed to work better than a heavy maul. I found if I hit the gluts too heard, they bounced back out, but if I hit them easier, they sank consistently.
I started working my way down the log, leap-frogging wedges and gluts until I worked my way all along the length of the log. I love the cracking sound as the split propagated along the log. You could here it cracking and popping long after the pounding stopped. I had to leave it overnight with the wedges buried, and it had split quite a bit by morning, just from the residual wedge pressure.
I finally got it split the next day. I will split each half again and remove the bark and find someplace to store the quarters until I figure out what to make with them. It had a slight twist to it, but not too bad at all. Then on to the other big log, and all the smaller ones too. What to make? What to make?
This is after splitting off one third of the left half. I measured it tonight and it is a little over 12 feet and about 15 inches in diameter. I think I will end up cutting lengths of either 6 or four feet depending on what I make. I should get about 12, 6-foot long 2x4s and 24, 6-foot long 2x2s from this log, all quarter-sawn grain.
I finished splitting the rest of the halves into thirds, giving me six beams total. I got the process down to a few easy steps. See below for some drawings that illustrate the steps.
This is a side view.
We can start working our way down the log now.
This is also a side view of the log.
The steel wedge is black, the wooden glut has arch shape on it.
You just repeat step 7a and 7b until you are at the end of the log. Each time you move the black wedge down and drive it in, you extend the crack along the log.
I should have made one of these right after I got my saw, like ten years ago. I finally got around to making one a few months ago, and it is great. I used 2x4s and MDF, pocket-hole screws, some bolts to attach it to the rail on the back side of my saw, and a piano hinge so I could fold it down. I used some knobbed bolts to tighten the folding legs in place, and some adjustable feet to fine tune the height. For the most part, I leave the table up but I like being able to fold it down and free up some floor space when I need to. It sure is nice when you are cutting some long stock, and you don't have to worry about it falling on the floor.
You can download a Sketchup model of the construction here.
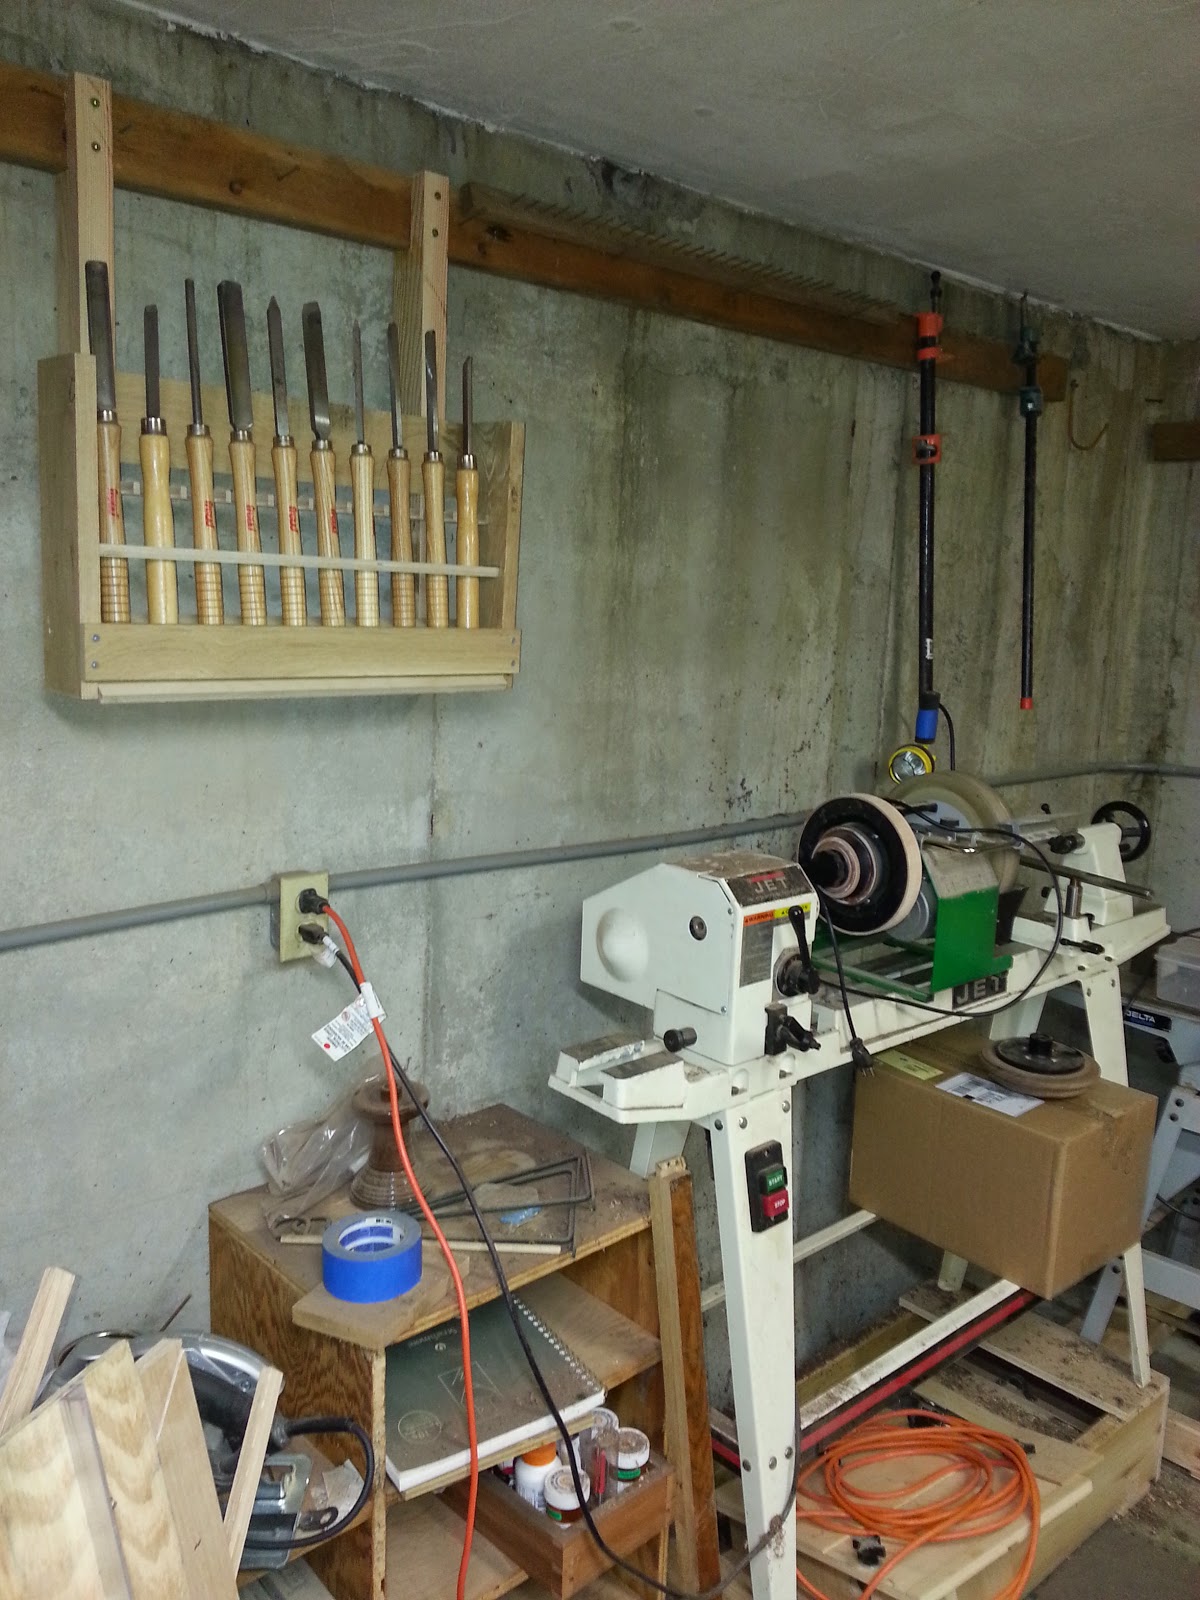
I got some new bowl gouges and a new roughing gouge and decided it was time to figure out were to put all my gouges, large and small, so I could get to them at the lathe without them being in the way and falling on the floor.
I saw some great ideas online and copied them.
I am still in the process of making my racks. I might end up with just two to start with, a large and a small, each holding 10 gouges. Here are the images of what I have come up with so far:
These are what I have to rack. I won't rack all of small ones, since I won't ever use some of them. I got a crappie set with the lathe and I can keep most of those stored away somewhere else.
This is the idea. You cut holes (I used 1 3/4" diameter holes) in a strip of wood, and cut the strip into two halves, then position them along with a slanted bottom piece so that the gouges lock into place with gravity.
For the small gouges I had to reposition the guide strips. I marked the position of everything in each configuration , large and small, and will make one for each size.
I got the small one made and mounted on the wall behind my lathe.
I added a couple blocks to the front rail of the small one to hold a few items. I also finished the large rack and installed it. Now I can get back to turning.
I finished the wooden jointer plane tonight. I turned a strike button from a piece of maple and installed it. I chamfered the top edges with my block plane and applied a coat of tongue oil to everything (except the iron). I did some test shavings and it seems to work fine. I also worked on a kanna (japanese plane) I got off of EBay, flattening its sole, and scraping the throat a little, and its works great now too. I am in plane heaven.
I got the tote done and installed today. I put it a little too close to the iron, but it is OK. I just have to use a little helper piece of wood to reach the top of the iron to strike it. I still need to put a strike button on the toe. I started to turn a piece of maple for a button, but I am missing a part on my lath that holds down the back part. It fell off and is laying around somewhere. I thought I could just glue a piece of wenge on there for now. Anyway, it turned out great. I planed the edges of some boards with it and I was getting fine shavings the whole length of the boards. Yay!
I used the tote template shown in the great tutorial by Sumokun at https://www.youtube.com/watch?v=TZ7zP4pajYo . I used quartersawn oak and oriented the grain about 45 degree so the little stub sticking out would be strong. I also enlarge the tote to fit my giant hands.
This is the plane after installing the tote. I chopped out the mortise for the tote with a chisel and flattened the bottom of the mortise with a router plane.
I will add the button, and chamfer the top outer edges and bevel the top edge of the wedge. The last step will be putting some finish oil on it.